Using FAST on Ultrasound data in python
Contents
- Ultrasound data
- Reading and visualizing ultrasound images
- Working with raw ultrasound image data
- Real-time streaming from ultrasound scanner
-
Ultrasound image processing
- Noise removal / De-noising / De-speckling
- Automatic ultrasound sector cropping
- Applying colormaps
- Applying a custom method to a stream of ultrasound images
- Block matching speckle tracking
- Neural network segmentation of an ultrasound image stream
- Neural network image classification of an ultrasound image stream
- Export visualization to video
- Changing pipeline parameters using a simple GUI
- Next steps
This is a tutorial for processing and visualizing Ultrasound data with FAST in python.
Ultrasound data
Ultrasound image data comes in many formats; as 2D images or 3D volumes, and often ultrasound data is a sequence of images/volumes over time. FAST can read sequences of ultrasound data stored as videos, images (.png/.jpeg), metaimages (.mhd/.raw/.zraw) and in ultrasound file format (UFF, HDF5). FAST can also stream data in real-time from ultrasound scanners either using the OpenIGTLink protocol or from Clarius scanners using their Cast API. Let's look at how we can stream data from each of these sources.
If you haven't already, download the test dataset before running the examples on this page:
import fast
fast.downloadTestDataIfNotExists()
Reading and visualizing ultrasound images
Read ultrasound images from a video
Use the MovieStreamer object to read image frames from a video. Note that videos are often stored as color data, even though ultrasound videos typically are grayscale. You can convert the video to grayscale, by passing grayscale=True to MovieStreamer, or by using ColorToGrayscale.
This example will stream the video and display it in a window:
import fast

streamer = fast.MovieStreamer\
    .create(fast.Config.getTestDataPath() + "/US/sagittal_spine.avi")

renderer = fast.ImageRenderer.create()\
    .connect(streamer)

fast.SimpleWindow2D.create()\
    .connect(renderer)\
    .run()
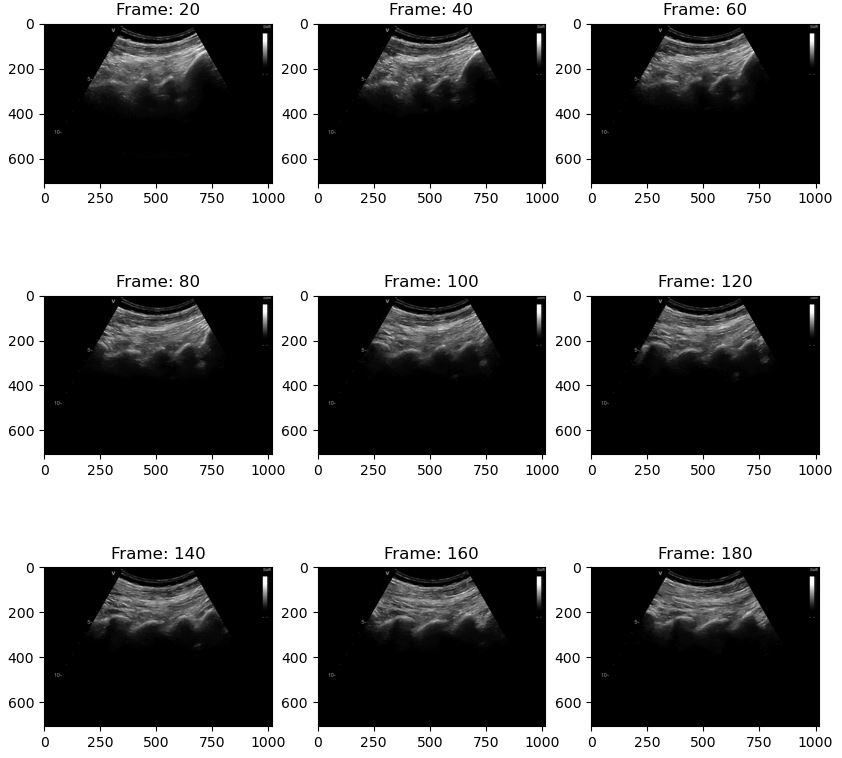
To get each frame from the video you can use the DataStream and a for loop. In this example we convert every 20th frame to a numpy array and display it with matplotlib
import fast
import numpy as np
import matplotlib.pyplot as plt

streamer = fast.MovieStreamer\
    .create(fast.Config.getTestDataPath() + "/US/sagittal_spine.avi",
    grayscale=True # Convert the images to grayscale
)

frame_list = []
counter = 0
for frame in fast.DataStream(streamer):
    counter += 1
    # Only show every 20th frame
    if counter % 20 == 0: frame_list.append((np.asarray(frame), counter))
    if len(frame_list) == 9:
        # Display the 9 last frames
        f, axes = plt.subplots(3,3, figsize=(10,10))
        for i in range(3):
            for j in range(3):
                axes[j, i].set_title('Frame: ' + str(frame_list[i + j*3][1]))
                axes[j, i].imshow(frame_list[i + j*3][0][..., 0], cmap='gray')
        plt.show()
        frame_list.clear()
        break # Remove to show more frames
Read a single ultrasound image and convert to numpy array
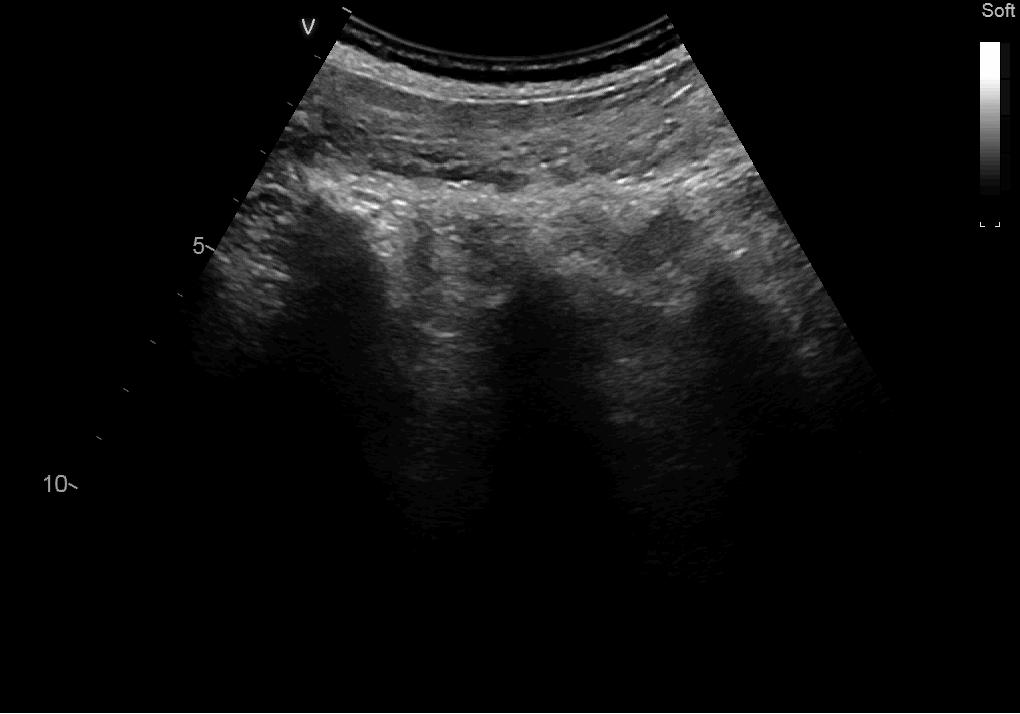
To read a single ultrasound image you can use the ImageFileImporter, and get the Image object using the runAndGetOutputData method. The resulting FAST Image can be convert to a numpy array using np.asarray():
import fast
import numpy as np

image = fast.ImageFileImporter\
    .create(fast.Config.getTestDataPath() + "/US/US-2D.jpg")\
    .runAndGetOutputData()

data = np.asarray(image)
print(data.shape, data.dtype, np.min(data), np.max(data))
# The print should return: (512, 512, 3) uint8 0 252

# The image returned was a color image, to convert it to grayscale you can do:
image = fast.ColorToGrayscale.create().connect(image).runAndGetOutputData()
data = np.asarray(image)
print(data.shape, data.dtype, np.min(data), np.max(data))
# The print should return: (512, 512, 1) uint8 0 252
Stream ultrasound images from a sequence of images
If you have ultrasound data stored as sequence of images (.png/.jpg) or as metaimages (.mhd/.raw/.zraw) you can stream them using the ImageFileStreamer. This assumes that the images are stored in the same folder, with same name except a number that increases for each frame. For example: frame_0.png, frame_1.png, frame_2.png ... or US_0.mhd, US_1.mhd, US_2.mhd ...
If you are streaming metaimages, the ImageFileStreamer will try to read the Timestamp attribute in the mhd file and stream the files in the speed it was stored in. This can be turned off with useTimestamps=False. If timestamps doesn't exists and the framerate is not specified, the images will be streamed as quickly as possible.
import fast

# Specify path to where the images are stored, use a # to represent the frame index
streamer = fast.ImageFileStreamer.create(
    fast.Config.getTestDataPath() + 'US/Heart/ApicalFourChamber/US-2D_#.mhd',
    framerate=20, # Specify framerate to stream data in
    loop=True # Loop recording forever
)

renderer = fast.ImageRenderer.create()\
    .connect(streamer)

fast.SimpleWindow2D.create()\
    .connect(renderer)\
    .run()

Read 3D ultrasound images from metaimage files
import fast

# Specify path to where the images are stored, use a # to represent the frame index
streamer = fast.ImageFileStreamer.create(
    fast.Config.getTestDataPath() + 'US/Ball/US-3Dt_#.mhd',
    framerate=5, # Specify framerate to stream data in
    loop=True # Loop recording forever
)

# Use SlicerWindow to display the 3D data
fast.SlicerWindow.create()\
    .connectImage(streamer)\
    .run()
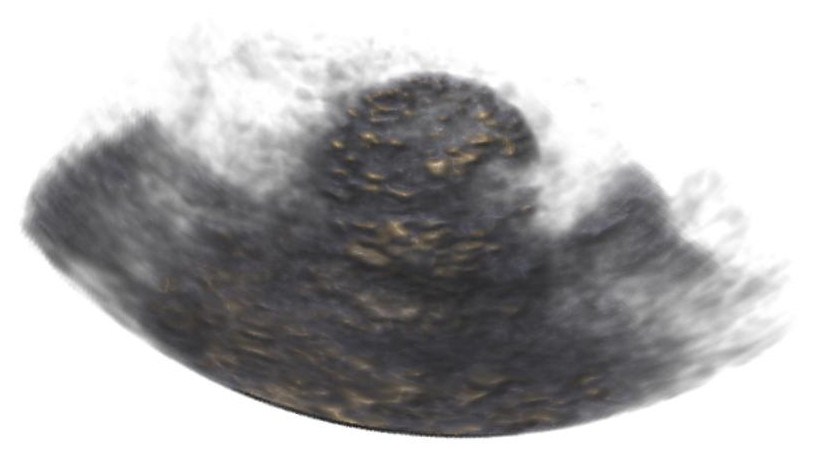
FAST has some simple volume rendering which can be used to render 3D data as well:
import fast

# Specify path to where the images are stored, use a # to represent the frame index
streamer = fast.ImageFileStreamer.create(
    fast.Config.getTestDataPath() + 'US/Ball/US-3Dt_#.mhd',
    framerate=5, # Specify framerate to stream data in
    loop=True # Loop recording forever
)

# You can create your own custom TransferFunction and give that to the create method.
# If not it will use the default ultrasound transfer function.
renderer = fast.AlphaBlendingVolumeRenderer.create()\
    .connect(streamer)

# Use SlicerWindow to display the 3D data
fast.SimpleWindow3D.create()\
    .connect(renderer)\
    .run()
Playback widget
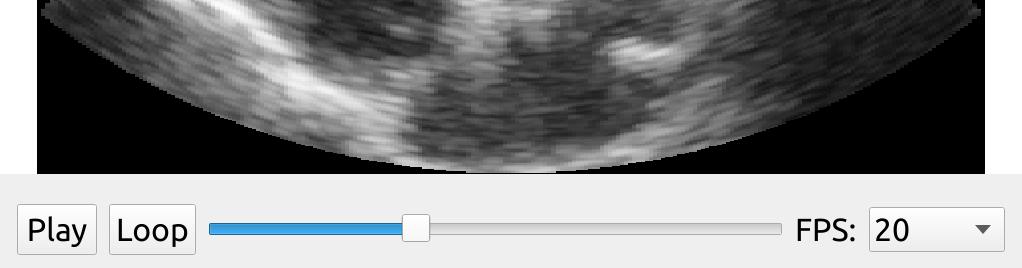
The PlaybackWidget is useful when you want some simple GUI to play/pause/stop, scroll through the frames or change the framerate. Give the streamer as input to the PlaybackWidget constructor and connect it to your window:
import fast

# Specify path to where the images are stored, use a # to represent the frame index
streamer = fast.ImageFileStreamer.create(
    fast.Config.getTestDataPath() + 'US/Heart/ApicalFourChamber/US-2D_#.mhd',
    framerate=20, # Specify framerate to stream data in
)

renderer = fast.ImageRenderer.create()\
    .connect(streamer)

# Create playback widget and connect it to the window
widget = fast.PlaybackWidget(streamer)
fast.SimpleWindow2D.create()\
    .connect(renderer)\
    .connect(widget)\
    .run()
Working with raw ultrasound image data
Read ultrasound data stored in the ultrasound file format (UFF, HDF5)
The UFFStreamer enables you to read ultrasound image data in the UFF format. The UFF format is used in the Matlab UltraSound ToolBox USTB. Note that FAST can only stream beamformed data, as FAST does not have a beamformer (yet). Here we use FAST to stream some UFF beamformed data and display it.
import fast

streamer = fast.UFFStreamer.create(
    fast.Config.getTestDataPath() + "US/UFF/P4_2_PLAX.uff",
    framerate=5,
    loop=True,
    scanConversionWidth=1024,
    scanConversionHeight=1024,
)

renderer = fast.ImageRenderer.create()\
    .connect(streamer)

widget = fast.PlaybackWidget(streamer)
fast.SimpleWindow2D.create()\
    .connect(renderer)\
    .connect(widget)\
    .run()
The UFFStreamer will scan convert the images by default, by you can disable this by setting doScanConversion=False in the create method. You can also set the gain and dynamic range if the data is stored in dB instead of grayscale units uint8 (0-255).
import fast

streamer = fast.UFFStreamer.create(
    fast.Config.getTestDataPath() + "US/UFF/P4_2_PLAX.uff",
    framerate=5,
    loop=True,
    doScanConversion=False, # Turn off scan conversion to get beamspace data
    convertToGrayscale=True, # Convert dB data to grayscale using the gain and dynamic range below
    gain=0,
    dynamicRange=60,
)

renderer = fast.ImageRenderer.create()\
    .connect(streamer)

widget = fast.PlaybackWidget(streamer)
fast.SimpleWindow2D.create()\
    .connect(renderer)\
    .connect(widget)\
    .run()
Scan conversion
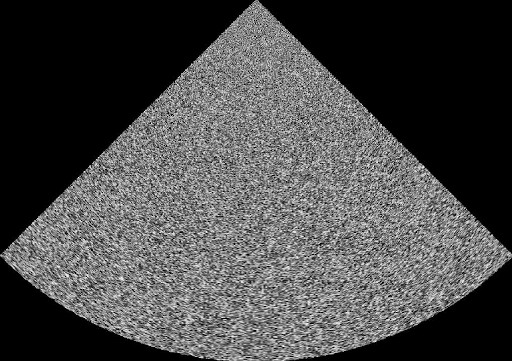
Use the ScanConverter to do scan conversion of beamspace data on the GPU. You can specify the size of the output image (width, height). If you have a sector scan you need to supply the startDepth and endDepth (physical units, e.g. meter, millimeter), as well as the start and end angle (radians). For linear scans you specify startDepth, endDepth, and left and right in physical units.
import fast
import numpy as np
import matplotlib.pyplot as plt

# Create some fake beamspace data
data = fast.Image.createFromArray(np.round(np.random.normal(size=(700,256,1))*255).astype(np.uint8))

# Scan convert (sector scan)
scan_convert = fast.ScanConverter.create(
                width=1280,
                height=1024,
                startDepth=0,
                endDepth=120,
                startAngle=-0.785398,
                endAngle=0.785398
        ).connect(data)

renderer = fast.ImageRenderer.create()\
        .connect(scan_convert)

fast.SimpleWindow2D.create()\
        .connect(renderer)\
        .run()

# Visualize output of scan converter with matplotlib instead of FAST:
plt.imshow(np.asarray(scan_convert.runAndGetOutputData())[..., 0], cmap='gray')
plt.show()
Envelope detection and log compression
FAST has some simple implementations of envelope detection and log compression running on the GPU. Here is example of how to do envelope detection, log compression and scan conversion on some IQ data:
import fast
import numpy as np
import matplotlib.pyplot as plt

# Create some fake IQ beamspace data
iq_data = fast.Image.createFromArray(np.random.normal(size=(512,512,2)).astype(np.float32))

# Create processing & visualization chain
envelope = fast.EnvelopeAndLogCompressor.create()\
        .connect(iq_data)

scan_convert = fast.ScanConverter.create(
                width=1280,
                height=1024,
                startDepth=0,
                endDepth=120,
                startAngle=-0.785398,
                endAngle=0.785398
        ).connect(envelope)

renderer = fast.ImageRenderer.create()\
        .connect(scan_convert)

fast.SimpleWindow2D.create()\
        .connect(renderer)\
        .run()

# Visualize output of scan converter with matplotlib instead of FAST:
plt.imshow(np.asarray(scan_convert.runAndGetOutputData())[..., 0], cmap='gray')
plt.show()
Beamform channel data with VBeam and process with FAST
This example shows how to use vbeam by Magnus Kvalevåg to beamform ultrasound channel data stored in the ultrasound file format (UFF) in python and then process the resulting IQ data to end up with a scanconverted filtered image on screen. Note that this example requires you to install vbeam and jax. It has been tested with version vbeam==1.05 and jax==0.4.16
To do this we first create a custom PythonRandomAccessStreamer with FAST where we use vbeam to load and beamform some UFF data as shown below.
from time import sleep
from typing import Union
import fast
import jax.numpy as np
import pyuff_ustb as pyuff
import vbeam.scan
from vbeam.data_importers import import_pyuff, parse_pyuff_scan
from vbeam.scan import sector_scan, linear_scan, LinearScan, SectorScan
import jax
from vbeam.beamformers import get_das_beamformer


class VbeamStreamer(fast.PythonRandomAccessStreamer):
    """
    Stream data from vbeam beamformer
    """
    def __init__(self, uff_file: str, grid_width: int = 256, grid_depth: int = 512, framerate: int = 2,
                 scan: Union[vbeam.scan.Scan, None] = None, max_depth: Union[float, None] = None, is_sector_scan: Union[bool, None] = None):
        super().__init__()
        self.createOutputPort(0)
        self.uff_file_path = uff_file
        self._data = None
        self.channel_data = None
        self.scan = scan
        self.grid_width = grid_width
        self.grid_depth = grid_depth
        self.N_frames = None
        self.setFramerate(framerate)
        self.is_sector_scan = is_sector_scan
        self.max_depth = max_depth

    def getNrOfFrames(self):
        """
        This function must return how many frames the streamer has.
        :return: nr of frames
        """
        if self.N_frames is None:
            self.initialize()
        return self.N_frames

    def initialize(self):
        """
        Read from UFF file
        :return:
        """
        print('Reading UFF ...')
        uff = pyuff.Uff(self.uff_file_path)
        self.channel_data = uff.read("/channel_data")
        self.N_frames = self.channel_data.N_frames
        try:
            self.scan = parse_pyuff_scan(uff.read('/scan'))
            print('Got scan from UFF file.')
        except:
            # Scan is missing from file
            print('Scan was not found in the UFF file.')

    def generateStream(self):
        if self.channel_data is None:
            self.initialize()

        # Beamform
        setup = import_pyuff(self.channel_data, scan=self.scan)

        frame_metadata = {}
        if self.max_depth is None:
            max_depth = self.channel_data.N_samples * (
                    1.0 / self.channel_data.sampling_frequency) * self.channel_data.sound_speed * 0.5
        else:
            max_depth = self.max_depth
        if self.scan is None:
            if self.is_sector_scan is None:
                raise ValueError('scan or is_sector_scan was not provided to VBeamStreamer constructor. Please provide one of these.')
            elif self.is_sector_scan:
                print(f'No scan provided. Creating a sector scan with max_depth {max_depth}, and grid size {self.grid_width}x{self.grid_depth}')
                scan_angles = np.array([wave.source.azimuth for wave in self.channel_data.sequence])
                scan_depths = np.linspace(0, max_depth, self.grid_depth)
                scan = sector_scan(scan_angles, scan_depths).resize(azimuths=self.grid_width)
            else:
                print(f'No scan provided. Creating a linear scan with max_depth {max_depth}, and grid size {self.grid_width}x{self.grid_depth}')
                scan_lines = np.linspace(self.channel_data.probe.geometry[0, 0], self.channel_data.probe.geometry[0, -1], self.grid_width)
                scan_depths = np.linspace(self.channel_data.probe.element_height, max_depth, self.grid_depth)
                scan = linear_scan(scan_lines, scan_depths)
            setup.scan = scan
        else:
            setup.scan = self.scan
        if isinstance(setup.scan, LinearScan):
            frame_metadata['isPolar'] = 'false'
            frame_metadata['startRadius'] = str(setup.scan.z[0])
            frame_metadata['stopRadius'] = str(setup.scan.z[-1])
            frame_metadata['startTheta'] = str(setup.scan.x[0])
            frame_metadata['stopTheta'] = str(setup.scan.x[-1])
        elif isinstance(setup.scan, SectorScan):
            scan_angles = np.array([wave.source.azimuth for wave in self.channel_data.sequence])
            frame_metadata['isPolar'] = 'true'
            frame_metadata['startRadius'] = str(0)
            frame_metadata['stopRadius'] = str(max_depth)
            frame_metadata['startTheta'] = str(scan_angles[0])
            frame_metadata['stopTheta'] = str(scan_angles[-1])
        print('Setting up beamformer ...')
        beamformer = jax.jit(get_das_beamformer(setup, scan_convert=False, log_compress=False))
        print('Beamforming now ...')
        self._data = beamformer(**setup.data)
        print(self._data.shape)
        if len(self._data.shape) == 2: # Missing temporal dimension because only 1 frame, add it:
            self._data = np.expand_dims(self._data, axis=0)
        print('Beamforming done')

        while not self.isStopped():
            # First, we need to check if this streaming is paused
            if self.getPause():
                self.waitForUnpause() # Wait for streamer to be unpaused
            pause = self.getPause() # Check whether to pause or not
            frame = self.getCurrentFrameIndex()

            data = self._data[frame, ...].T
            data2 = np.transpose(np.stack([data.real, data.imag]), axes=(1,2,0)) # Rearrange data for FAST
            image = fast.Image.createFromArray(data2._value) # ndarray data is in _value
            image.setFrameData(frame_metadata)
            if frame == self.getNrOfFrames()-1: # If this is last frame, mark it as such
                image.setLastFrame('VBeamStreamer')

            if not pause:
                if self.getFramerate() > 0:
                    sleep(1.0/self.getFramerate()) # Sleep to give the requested framerate
                self.getCurrentFrameIndexAndUpdate() # Update the frame index to the next frame
            try:
                self.addOutputData(0, image)
                self.frameAdded() # Important to notify any listeners
            except:
                break

    def refresh(self):
        # FIXME Get a 1 frame glitch when first doing this. Old frame in memory?
        if self.getPause():
            self.setCurrentFrameIndex(self.getCurrentFrameIndex())
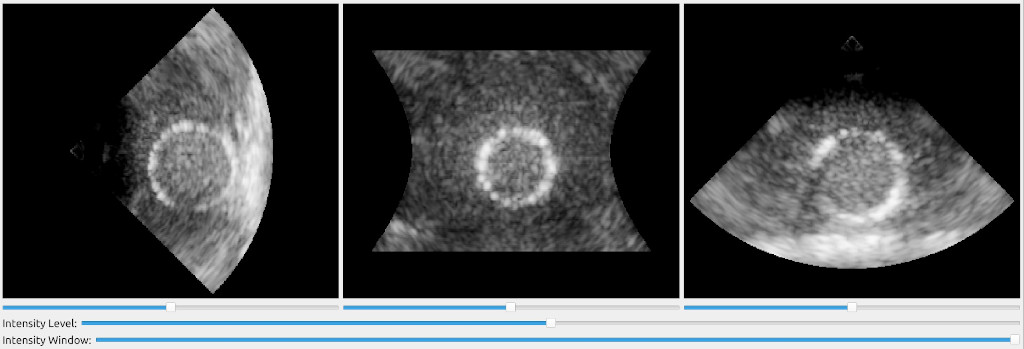
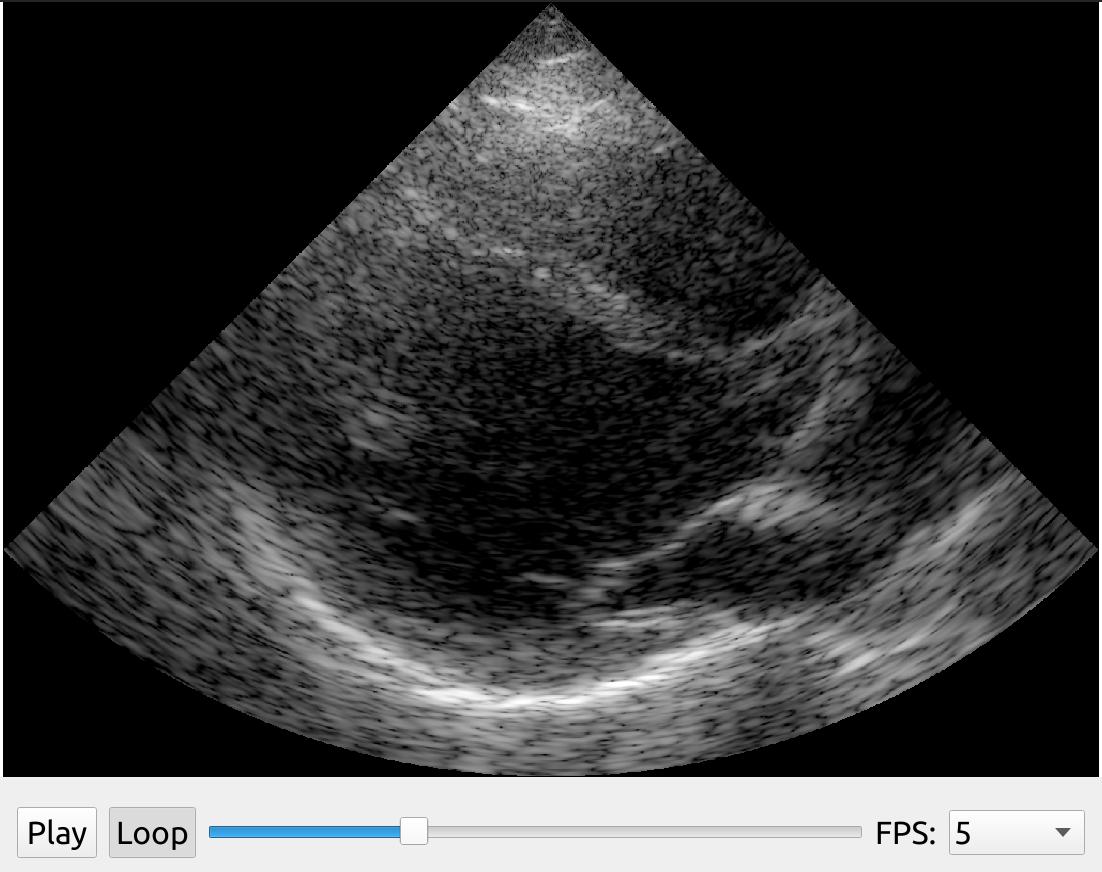
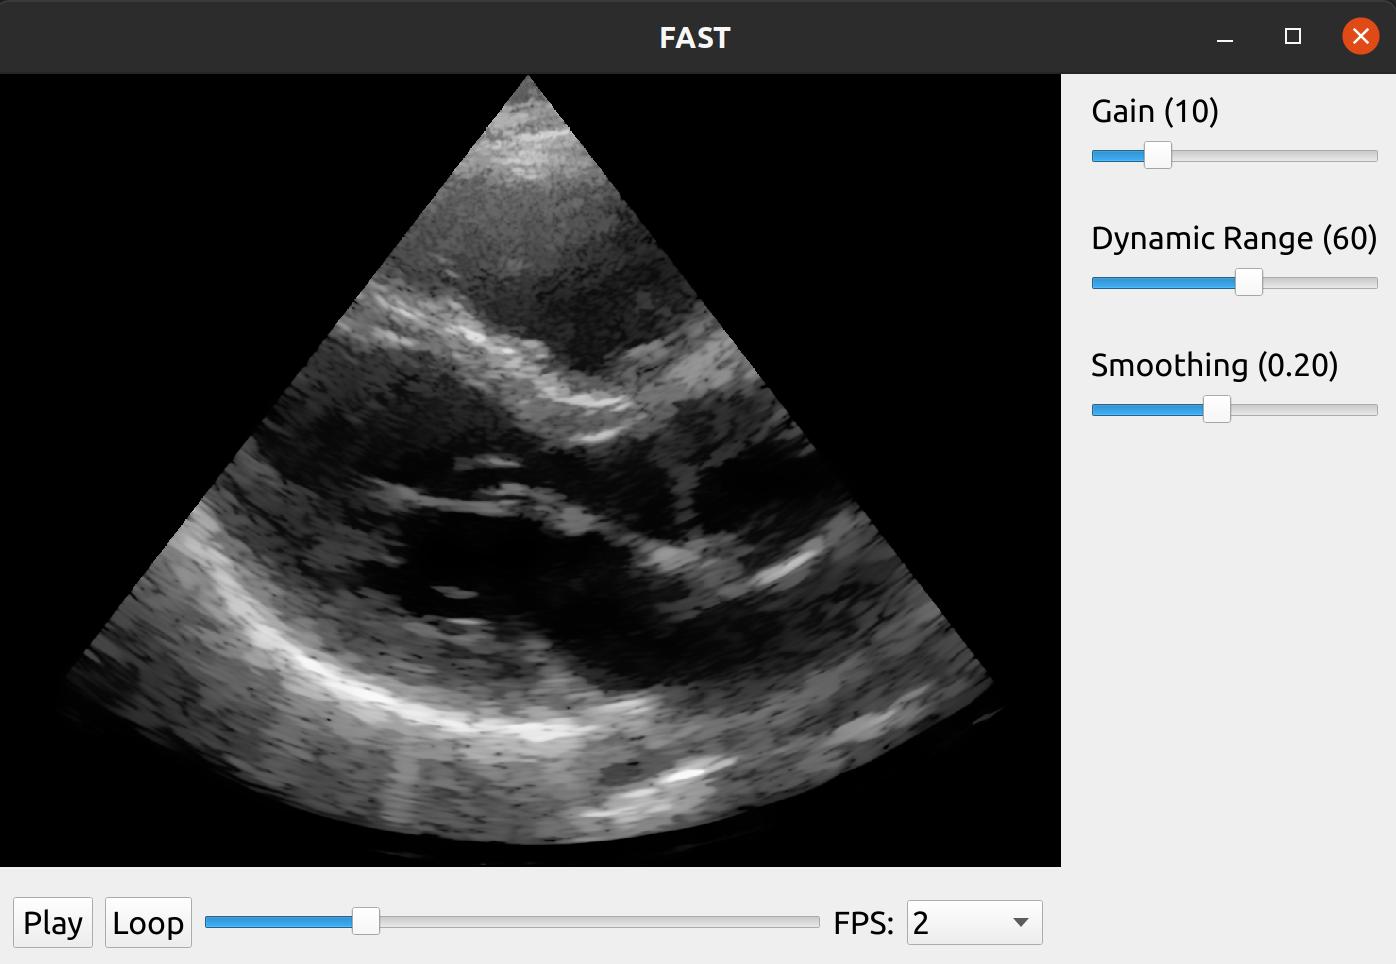
We can now use this streamer in a FAST pipeline were we apply some simple envelope and log compression to the IQ data and then scan convert and filter the final image using Non-Local Means. We can also add some slider widgets to the window to let the user control the gain, dynamic range and smoothing amount as well as playback widget to easily play/stop and scroll in the recording.
import fast
from vbeam.util.download import cached_download
from vbeam_streamer import VBeamStreamer

# UFF dataset to download and run
data_url = "http://www.ustb.no/datasets/Verasonics_P2-4_parasternal_long_small.uff"
#data_url = "http://www.ustb.no/datasets/PICMUS_carotid_cross.uff"
#data_url = "http://www.ustb.no/datasets/PICMUS_carotid_long.uff"

# Setup vbeam streamer
streamer = VBeamStreamer.create(cached_download(data_url), is_sector_scan=True)

# Setup processing chain
logCompress = fast.EnvelopeAndLogCompressor.create().connect(streamer)

scanConvert = fast.ScanConverter.create(1024, 1024).connect(logCompress)

filter = fast.NonLocalMeans.create(filterSize=3, searchSize=11,
                                   inputMultiplicationWeight=0.25,
                                   smoothingAmount=0.1).connect(scanConvert)

# Setup widgets
widget = fast.PlaybackWidget(streamer)
gainSlider = fast.SliderWidget('Gain', 10, 0, 50, 5, fast.SliderCallback(lambda x: (scanConvert.setGain(x), streamer.refresh())))
dynamicRangeSlider = fast.SliderWidget('Dynamic Range', 60, 10, 100, 5, fast.SliderCallback(lambda x: (scanConvert.setDynamicRange(x), streamer.refresh())))
smoothingSlider = fast.SliderWidget('Smoothing', 0.10, 0.05, 0.4, 0.05, fast.SliderCallback(lambda x: (filter.setSmoothingAmount(x), streamer.refresh())))

# Setup rendering, window and run
renderer = fast.ImageRenderer.create().connect(filter)

fast.SimpleWindow2D.create(bgcolor=fast.Color.Black()) \
    .connect(renderer) \
    .connect(widget) \
    .connect([gainSlider, dynamicRangeSlider, smoothingSlider], fast.WidgetPosition_RIGHT) \
    .run()
The results should look like this:
Real-time streaming from ultrasound scanner
OpenIGTLink
OpenIGTLink is an open protocol for transferring image, tracking and other data to and from medical imaging devices in real-time. Here is an example of how to use the OpenIGTLinkStreamer in FAST to stream image data and visualize it in real-time:
import fast

streamer = fast.OpenIGTLinkStreamer.create("localhost", 18944)

renderer = fast.ImageRenderer.create()\
    .connect(streamer)

fast.SimpleWindow2D.create()\
    .connect(renderer)\
    .run()
Clarius
FAST is bundled with the Clarius Cast API which enables you to stream image data from the handheld ultrasound scanners from Claruis. Note that you need a specific license from Clarius to enable real-time streaming.
In the clarius app, make sure you have selected "Research (5828)" under Clarius Cast in settings. This will fix the streaming port to 5828. After this is done, connect to the clarius probe's WiFi access point with your machine running FAST. You should then be able to use the ClariusStreamer in FAST as shown in the example below. The password for the access point is added to the clipboard on your mobile device when connecting using the device.
Note for Windows:** The windows firewall will block the images sent from the Clarius scanner. Thus you need to disable the windows firewall or add an exception in the firewall.
import fast

streamer = fast.ClariusStreamer.create("192.168.1.1", 5828)

renderer = fast.ImageRenderer.create()\
    .connect(streamer)

fast.SimpleWindow2D.create()\
    .connect(renderer)\
    .run()
Ultrasound image processing
Noise removal / De-noising / De-speckling
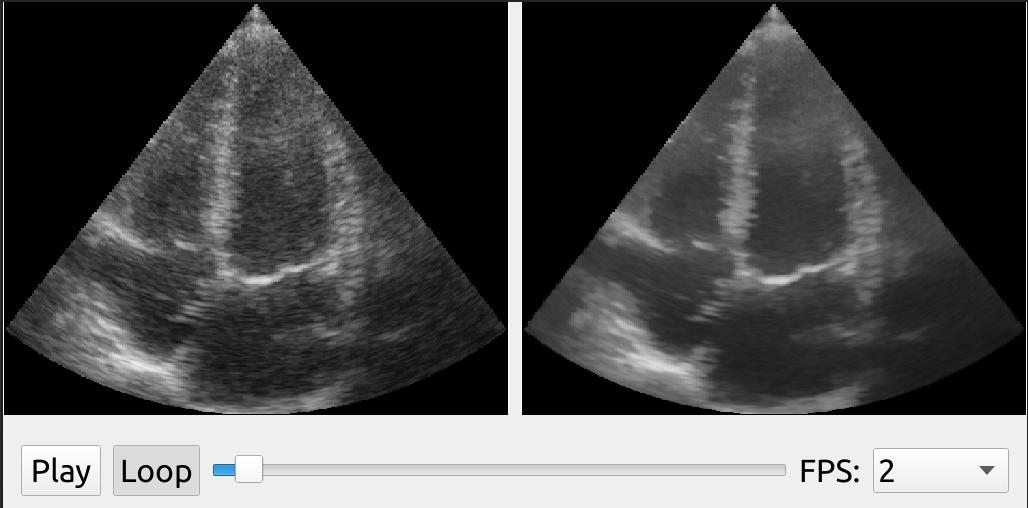
FAST has an implementation of a Non Local Means filter which can remove noise and smooth speckle while preserving edges of ultrasound images on the GPU. The Non Local Means filter has several parameters which you can tune to get the look you want.
In this example, we use the DualViewWindow2D to show the original ultrasound image on the left side, and the processed image on the right:
import fast

streamer = fast.ImageFileStreamer.create(
    fast.Config.getTestDataPath() + 'US/Heart/ApicalFourChamber/US-2D_#.mhd',
    framerate=2,
    loop=True
)

nlm = fast.NonLocalMeans.create(
        filterSize=3, # Increasing this makes it slower
        searchSize=11, # Increasing this makes it slower
        smoothingAmount=0.2,
        inputMultiplicationWeight=0.5,
).connect(streamer)

renderer = fast.ImageRenderer.create()\
    .connect(streamer)

rendererNLM = fast.ImageRenderer.create()\
    .connect(nlm)

widget = fast.PlaybackWidget(streamer)
fast.DualViewWindow2D.create(width=1024, height=512)\
    .connectLeft(renderer)\
    .connectRight(rendererNLM)\
    .connect(widget)\
    .run()
Automatic ultrasound sector cropping
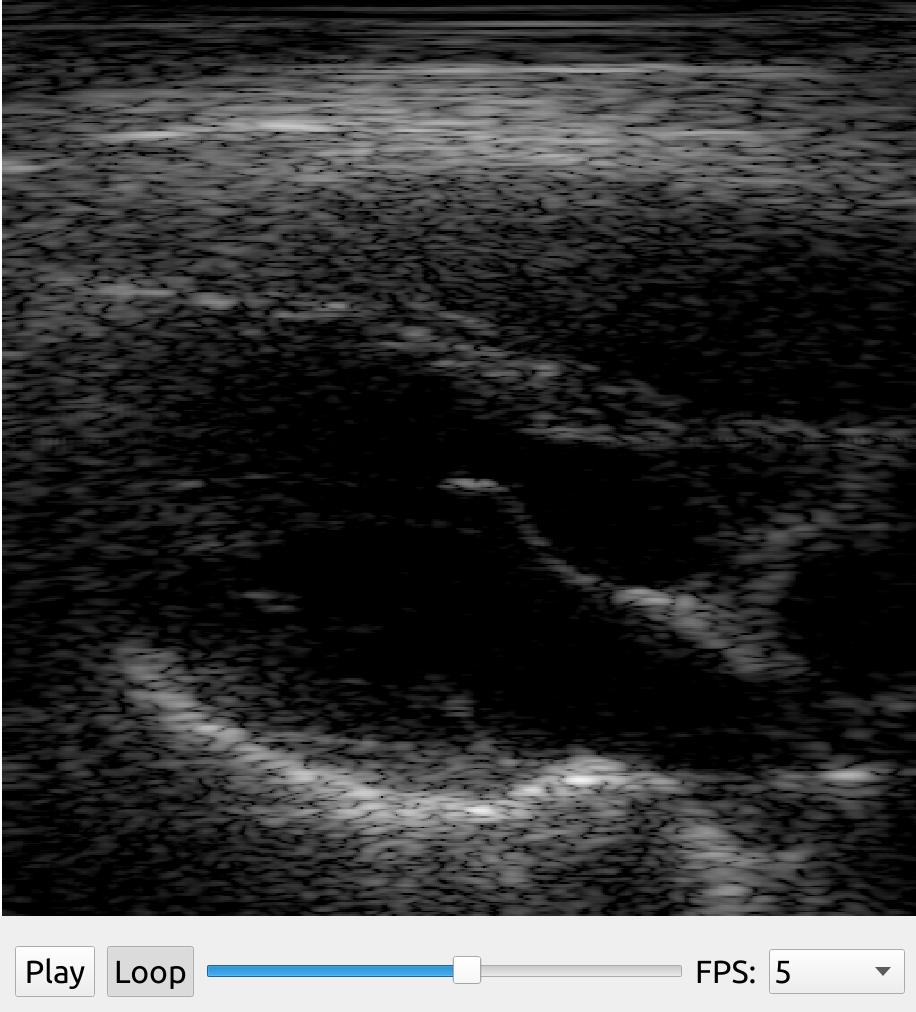
Sometimes ultrasound images are stored or streamed with padding around the image, or it can include text and the scanner GUI around the image. The UltrasoundImageCropper tries to extract the ultrasound image from the entire scanner GUI image using two thresholds. It does this by counting the number of non-zero pixels in every row and column of the image. This works best on linear array images.
The UltrasoundImageCropper has some parameters which you can try to tune to get the best result.
import fast

streamer = fast.MovieStreamer\
    .create(fast.Config.getTestDataPath() + "/US/sagittal_spine.avi")

cropper = fast.UltrasoundImageCropper.create(
    staticCropping=False, # Estimate cropping on first frame only or not
    thresholdVertical=30,
    thresholdHorizontal=10,
).connect(streamer)

renderer = fast.ImageRenderer.create()\
    .connect(streamer)

renderer2 = fast.ImageRenderer.create()\
    .connect(cropper)

fast.DualViewWindow2D.create()\
    .connectLeft(renderer)\
    .connectRight(renderer2)\
    .run()
Applying colormaps
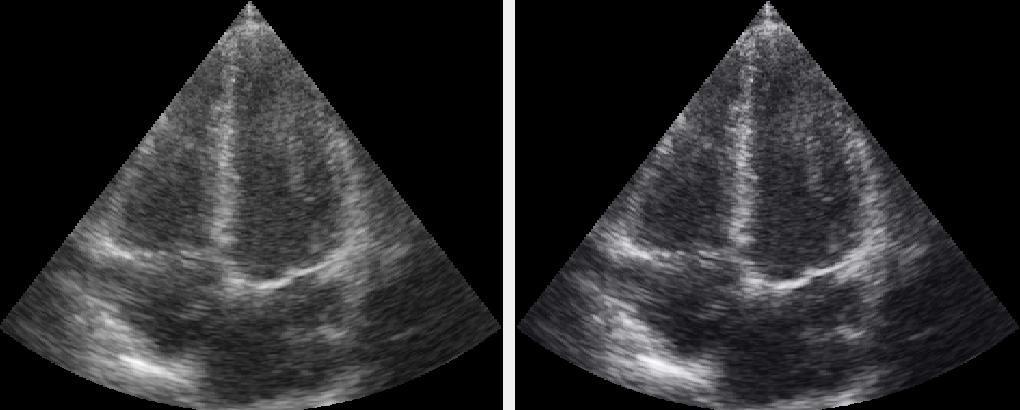
Ultrasound image data is often displayed using a predefined colormap. You can create your own color or grayscale colormap using the Colormap object, and then apply it in a FAST pipeline using the ApplyColormap process object.
Here is an example of applying a built-in ultrasound colormap which applies and S-curve colormap with a hint of blue. The result is compared to the original using the DualViewWindow:
import fast

streamer = fast.ImageFileStreamer.create(
    fast.Config.getTestDataPath() + 'US/Heart/ApicalFourChamber/US-2D_#.mhd',
    loop=True,
    framerate=20
)

# Use a predefined S-curve ultrasound colormap
colormap = fast.Colormap.Ultrasound()

apply = fast.ApplyColormap.create(colormap)\
    .connect(streamer)

renderer = fast.ImageRenderer.create()\
    .connect(streamer)

rendererColormap = fast.ImageRenderer.create()\
    .connect(apply)

fast.DualViewWindow2D.create(width=1024, height=512)\
    .connectLeft(renderer)\
    .connectRight(rendererColormap)\
    .run()
You can create your own custom colormaps from a list of floats:
import fast

# Create colormap from a list of floating point numbers
# The floats must be intensity_source1, intensity_output1, intensity_source2, intensity_output2, ... N if you
# have a grayscale colormap.
# If you have a RGB colormap it should be: intensity_source1, red1, green1, blue1, intensity_source2, red2, green2, blue2, .... N
# Grayscale:
colormap = fast.Colormap([0, 0, 100, 50, 200, 180, 255, 255], True)
# Color:
colormap = fast.Colormap([0, 0, 0, 0, 100, 50, 50, 50, 200, 180, 180, 180, 255, 255, 255, 255], False)
# Without interpolation, set last argument to False
colormap = fast.Colormap([0, 0, 100, 50, 200, 180, 255, 255], True, False)
Applying a custom method to a stream of ultrasound images
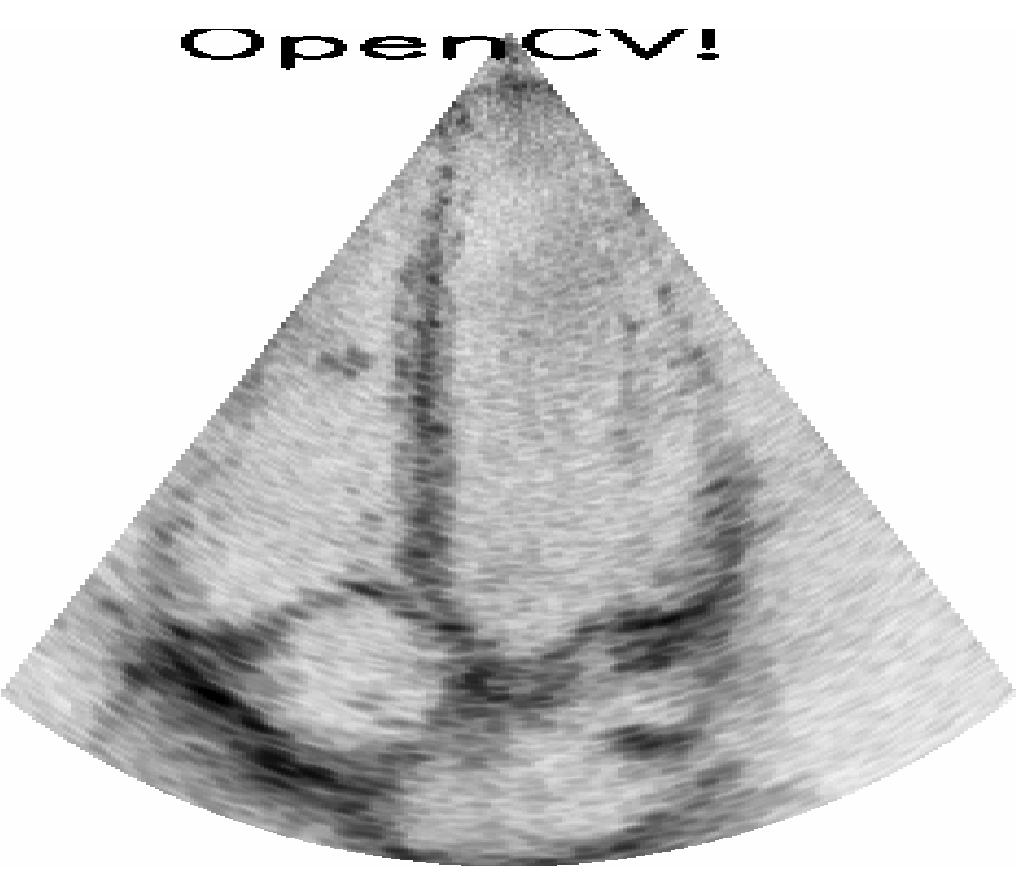
You can inject any Python code into a FAST processing pipeline by extending the PythonProcessObject class, and injecting it into your processing pipeline. Here is a complete example on how where we create a custom process object which inverts the ultrasound image using numpy and writes a text on the image if you have OpenCV installed.
import fast
import numpy as np

# Check if OpenCV is available
use_opencv = False
try:
    import cv2
    use_opencv = True
except ImportError:
    pass


""" Make a python process object which simply inverts image with numpy """
class Inverter(fast.PythonProcessObject):
    def __init__(self):
        super().__init__()
        self.createInputPort(0)
        self.createOutputPort(0)

    def execute(self):
        # Get image and invert it with numpy
        image = self.getInputData()
        np_image = np.asarray(image)
        np_image = 255 - np_image # invert

        # If OpenCV is available, add some text using OpenCV
        if use_opencv:
            cv2.putText(np_image, 'OpenCV!', (40, 20), cv2.FONT_HERSHEY_SIMPLEX, 1, (0,0,0), 2)

        # Create new fast image and add as output
        new_output_image = fast.Image.createFromArray(np_image)
        new_output_image.setSpacing(image.getSpacing())
        self.addOutputData(0, new_output_image)


# Set up pipeline as normal
importer = fast.ImageFileStreamer.create(
    fast.Config.getTestDataPath() + 'US/Heart/ApicalFourChamber/US-2D_#.mhd',
    loop=True,
    framerate=40,
)

inverter = Inverter.create()\
    .connect(importer)

renderer = fast.ImageRenderer.create()\
    .connect(inverter)

fast.SimpleWindow2D.create()\
    .connect(renderer)\
    .run()
Block matching speckle tracking
Block matching is a common method for speckle tracking in ultrasound data. FAST has a GPU implementation of block matching using different matching metrics such as sum of absolute differences, sum of squared differences, and normalized cross-correlation.
import fast
import matplotlib.pyplot as plt
import numpy as np

visualize_with_matplotlib = True    # Switch between using FAST and matplotlib for visualization

streamer = fast.ImageFileStreamer.create(fast.Config.getTestDataPath() + '/US/Heart/ApicalFourChamber/US-2D_#.mhd')

blockMatching = fast.BlockMatching.create(
        blockSize=13,
        searchSize=11,
        metric=fast.MatchingMetric_SUM_OF_ABSOLUTE_DIFFERENCES,
        timeLag=1,
        forwardBackwardTracking=False,
).connect(streamer)
blockMatching.setIntensityThreshold(75)

if visualize_with_matplotlib:
    frame_nr = 0
    for fast_image, vectorField in fast.DataStream(streamer, blockMatching):
        spacing = fast_image.getSpacing()
        image = np.asarray(fast_image)
        vectorField = np.asarray(vectorField)

        if frame_nr > 0: # Skip first frame
            plt.imshow(image[..., 0], cmap='gray', aspect=spacing[1]/spacing[0])
            # Show a downsampled vector field
            step = 8
            Y, X = np.mgrid[0:image.shape[0]:step, 0:image.shape[1]:step]
            plt.quiver(X, Y, vectorField[::step, ::step, 0], vectorField[::step, ::step, 1], color='r', scale=step*10)
            plt.show()

        frame_nr += 1

        if fast_image.isLastFrame():
            break

else:
    imageRenderer = fast.ImageRenderer.create().connect(streamer)
    vectorRenderer = fast.VectorFieldColorRenderer.create().connect(blockMatching)
    fast.SimpleWindow2D.create()\
        .connect(imageRenderer)\
        .connect(vectorRenderer)\
        .run()
Neural network segmentation of an ultrasound image stream
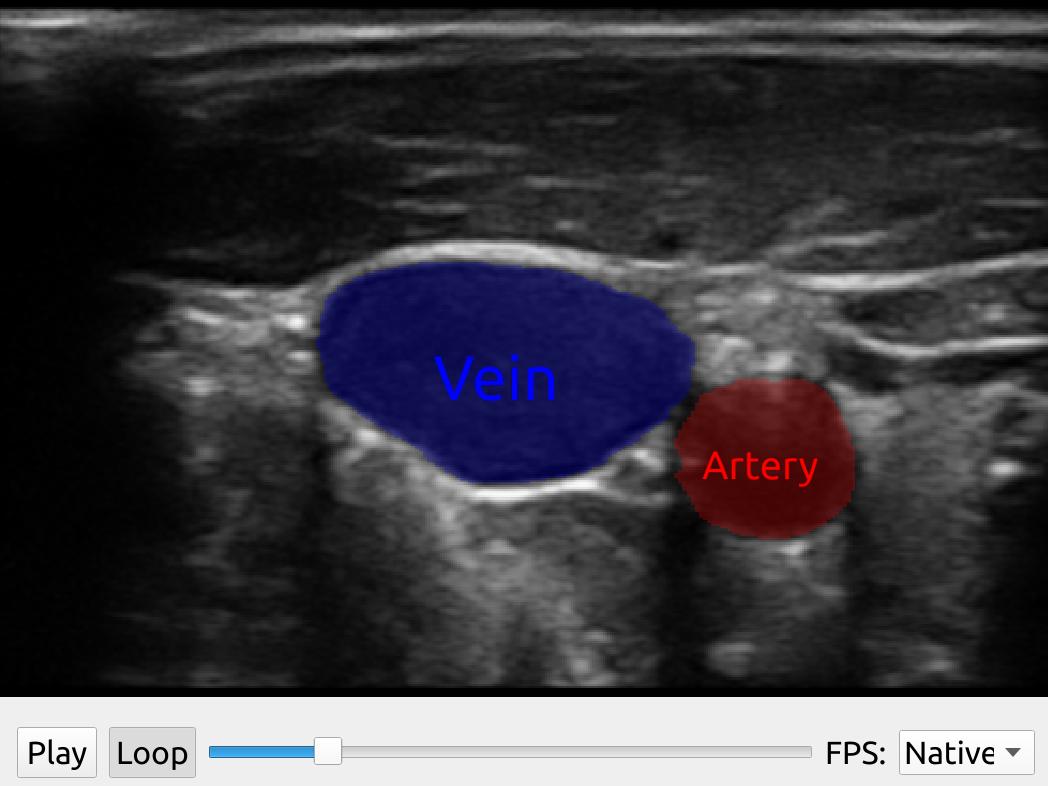
You can use the SegmentationNetwork utility class to do image segmentation on a stream of ultrasound images as shown in the following example:
import fast

streamer = fast.ImageFileStreamer.create(
    fast.Config.getTestDataPath() + 'US/JugularVein/US-2D_#.mhd',
    loop=True
)

segmentationNetwork = fast.SegmentationNetwork.create(
    fast.Config.getTestDataPath() + 'NeuralNetworkModels/jugular_vein_segmentation.onnx',
    scaleFactor=1./255.
).connect(streamer)

imageRenderer = fast.ImageRenderer.create().connect(streamer)

segmentationRenderer = fast.SegmentationRenderer.create(
    opacity=0.25,
    colors={1: fast.Color.Red(), 2: fast.Color.Blue()},
).connect(segmentationNetwork)

labelRenderer = fast.SegmentationLabelRenderer.create(
        labelNames={1: 'Artery', 2: 'Vein'},
        labelColors={1: fast.Color.Red(), 2: fast.Color.Blue()},
).connect(segmentationNetwork)

widget = fast.PlaybackWidget(streamer)

fast.SimpleWindow2D.create(bgcolor=fast.Color.Black())\
    .connect([imageRenderer, segmentationRenderer, labelRenderer])\
    .connect(widget)\
    .run()
Neural network image classification of an ultrasound image stream
You can use the ImageClassificationNetwork utility class to do image classification on a stream of ultrasound images. The output of this process object is ImageClassification data, which you can convert to text data and display with the TextRenderer as in the following example:
import fast

streamer = fast.ImageFileStreamer.create(
    fast.Config.getTestDataPath() + 'US/JugularVein/US-2D_#.mhd',
    loop=True
)

classificationNetwork = fast.ImageClassificationNetwork.create(
    'classification_model.onnx'
    labels=['Label 1', 'Label 2', 'Label 3'], # Supply the name of each output class
    scaleFactor=1./255.
).connect(streamer)

toText = fast.ClassificationToText.create()\
    .connect(classificationNetwork)

imageRenderer = fast.ImageRenderer.create()\
    .connect(streamer)

textRenderer = fast.TextRenderer.create()\
    .connect(toText)

widget = fast.PlaybackWidget(streamer)

fast.SimpleWindow2D.create(bgcolor=fast.Color.Black())\
    .connect([imageRenderer, textRenderer])\
    .connect(widget)\
    .run()
Export visualization to video
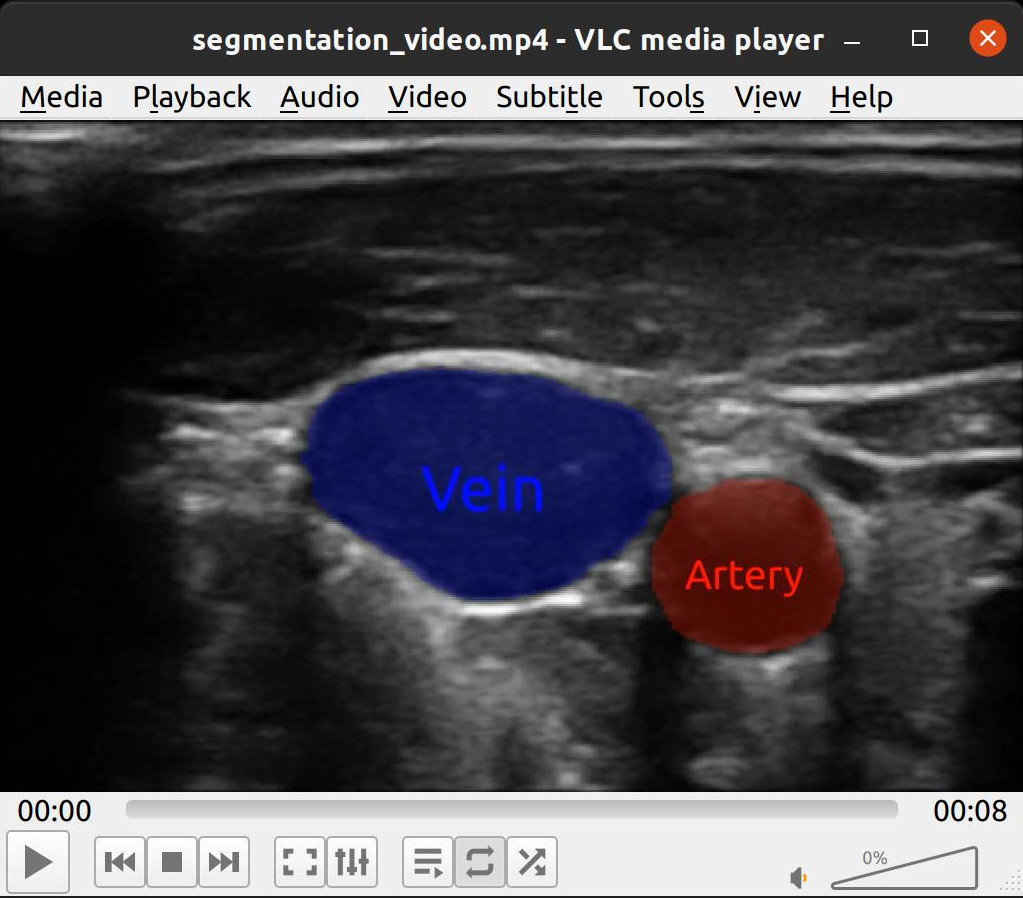
FAST visualizations can be converted to images using the RenderToImage process object which you then can save. Here is an example of using RenderToImage to save the visualization of a neural network segmentation pipeline of every frame in an ultrasound recording to a video file using imageio.
import fast
import imageio

# Set up processing pipeline
streamer = fast.ImageFileStreamer.create(
    fast.Config.getTestDataPath() + 'US/JugularVein/US-2D_#.mhd',
    loop=False
)

segmentationNetwork = fast.SegmentationNetwork.create(
    fast.Config.getTestDataPath() + 'NeuralNetworkModels/jugular_vein_segmentation.onnx',
    scaleFactor=1./255.
).connect(streamer)

# Set up rendering
imageRenderer = fast.ImageRenderer.create().connect(streamer)

segmentationRenderer = fast.SegmentationRenderer.create(
    opacity=0.25,
    colors={1: fast.Color.Red(), 2: fast.Color.Blue()},
).connect(segmentationNetwork)

labelRenderer = fast.SegmentationLabelRenderer.create(
        labelNames={1: 'Artery', 2: 'Vein'},
        labelColors={1: fast.Color.Red(), 2: fast.Color.Blue()},
).connect(segmentationNetwork)

# Render to image
renderToImage = fast.RenderToImage.create(bgcolor=fast.Color.Black())\
        .connect([imageRenderer, segmentationRenderer, labelRenderer])

# Collect all image frames
frames = []
for image in fast.DataStream(renderToImage):
    frames.append(image)
    print(len(frames))

# Save frames as video
imageio.mimsave('segmentation_video.mp4', frames, fps=20)
Changing pipeline parameters using a simple GUI
FAST provides some simple GUI widgets which can be connected to process objects and added to the window. This enables you to change parameters in the GUI and see the effects in real-time with just one line of code.
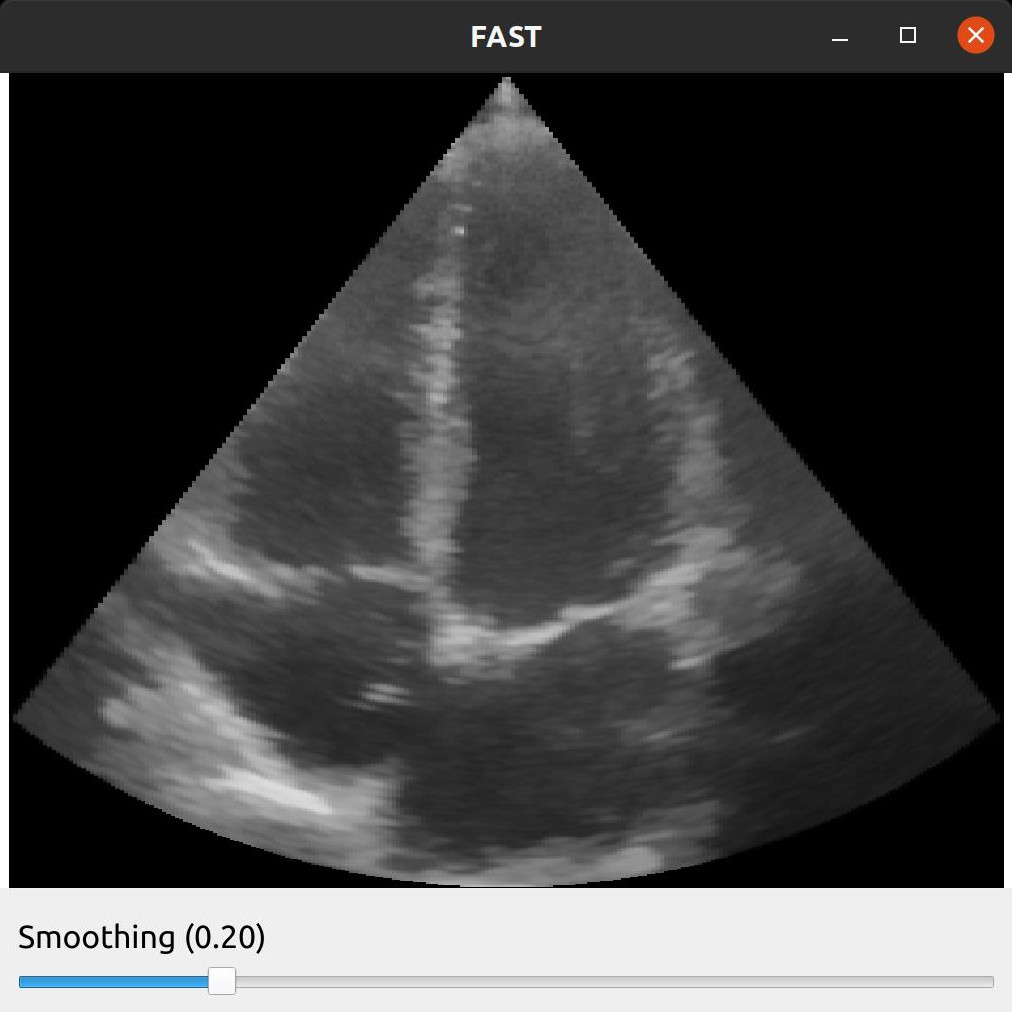
Here is an example were we added a SliderWidget to control the smoothing amount of the Non Local Means noise removal filter.
import fast

importer = fast.ImageFileImporter.create(fast.Config.getTestDataPath() + 'US/Heart/ApicalFourChamber/US-2D_0.mhd')

nlm = fast.NonLocalMeans.create(
        filterSize=3, # Increasing this makes it slower
        searchSize=11, # Increasing this makes it slower
        smoothingAmount=0.2,
        inputMultiplicationWeight=0.5,
).connect(importer)

rendererNLM = fast.ImageRenderer.create()\
    .connect(nlm)

sliderWidget = fast.SliderWidget('Smoothing', 0.2, 0.05, 0.8, 0.05, fast.SliderCallback(lambda x: nlm.setSmoothingAmount(x)))
fast.SimpleWindow2D.create()\
    .connect(rendererNLM)\
    .connect(sliderWidget)\
    .run()
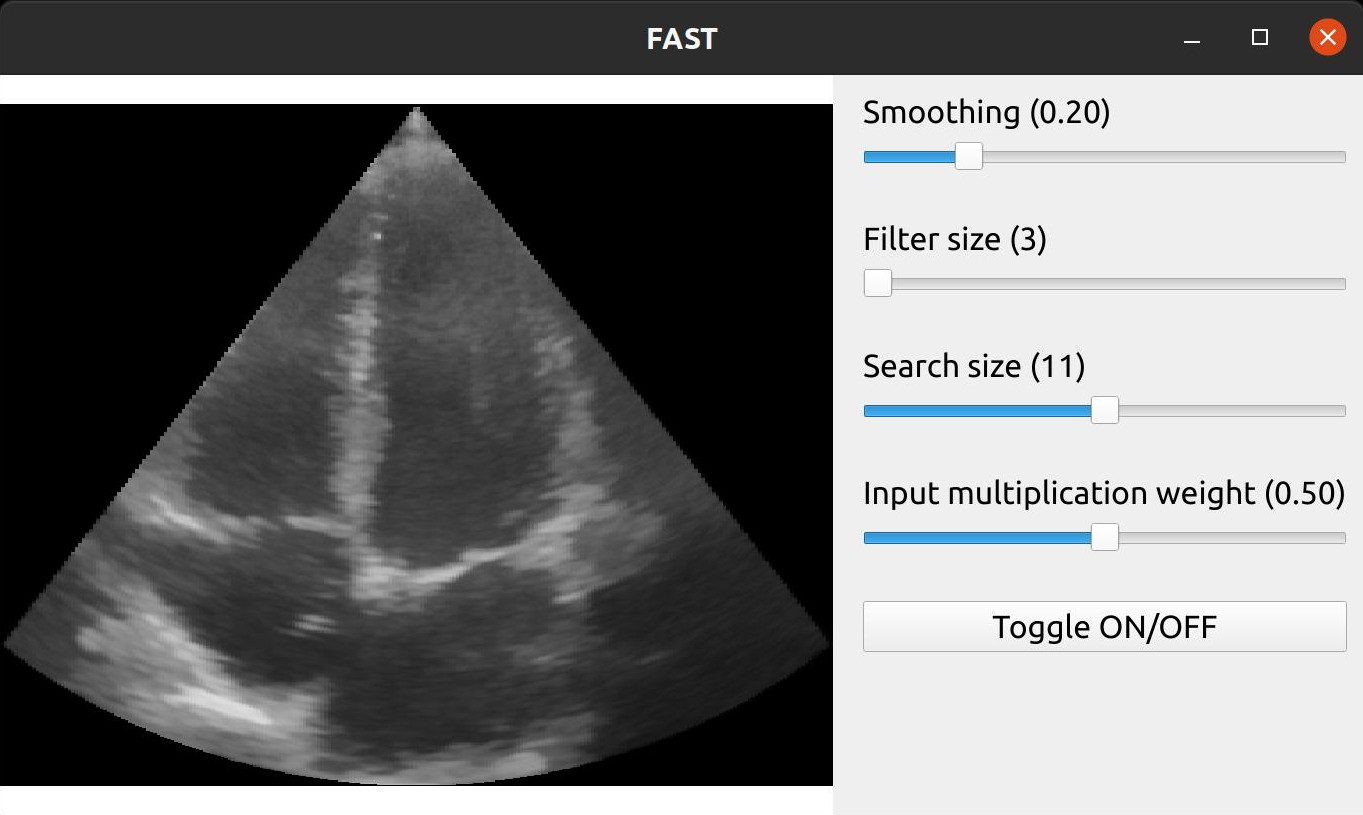
Here is an example with more widgets to control the Non Local Means filter, including a button to toggle the filter on and off by disabling the renderer.
import fast

importer = fast.ImageFileImporter.create(fast.Config.getTestDataPath() + 'US/Heart/ApicalFourChamber/US-2D_0.mhd')

nlm = fast.NonLocalMeans.create(
        filterSize=3, # Increasing this makes it slower
        searchSize=11, # Increasing this makes it slower
        smoothingAmount=0.2,
        inputMultiplicationWeight=0.5,
).connect(importer)

renderer = fast.ImageRenderer.create()\
    .connect(importer)

rendererNLM = fast.ImageRenderer.create()\
    .connect(nlm)

sliderWidget = fast.SliderWidget('Smoothing', 0.2, 0.05, 0.8, 0.05, fast.SliderCallback(lambda x: nlm.setSmoothingAmount(x)))
filterWidget = fast.SliderWidget('Filter size', 3, 3, 19, 2, fast.SliderCallback(lambda x: nlm.setFilterSize(int(x))))
searchWidget = fast.SliderWidget('Search size', 11, 3, 19, 2, fast.SliderCallback(lambda x: nlm.setSearchSize(int(x))))
inputWidget = fast.SliderWidget('Input multiplication weight', 0.5, 0.0, 1.0, 0.05, fast.SliderCallback(lambda x: nlm.setInputMultiplicationWeight(x)))
toggleButton = fast.ButtonWidget('Toggle ON/OFF', True, fast.ButtonCallback(lambda x: rendererNLM.setDisabled(x)))
fast.SimpleWindow2D.create()\
    .connect(renderer)\
    .connect(rendererNLM)\
    .connect([sliderWidget, filterWidget, searchWidget, inputWidget, toggleButton], fast.WidgetPosition_RIGHT)\
    .run()
Next steps
- See more Python Tutorials.
- Check out some Python Examples.
- Review Concepts & Glossary used in FAST.